
Working with Dynamic creatives
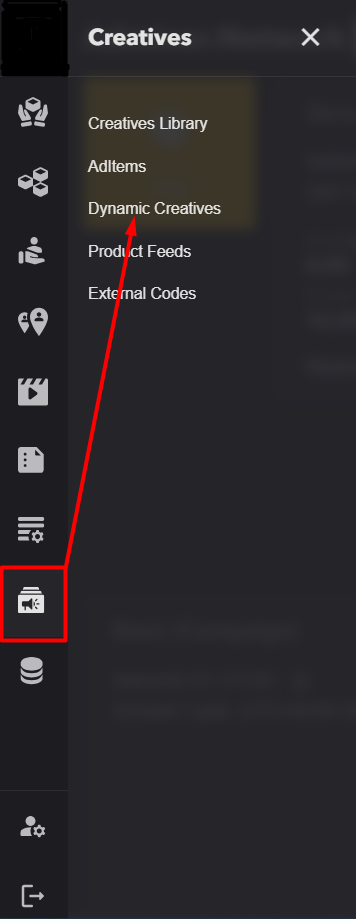
- On the desktop, find the menu Creatives and then Dynamic Creatives.
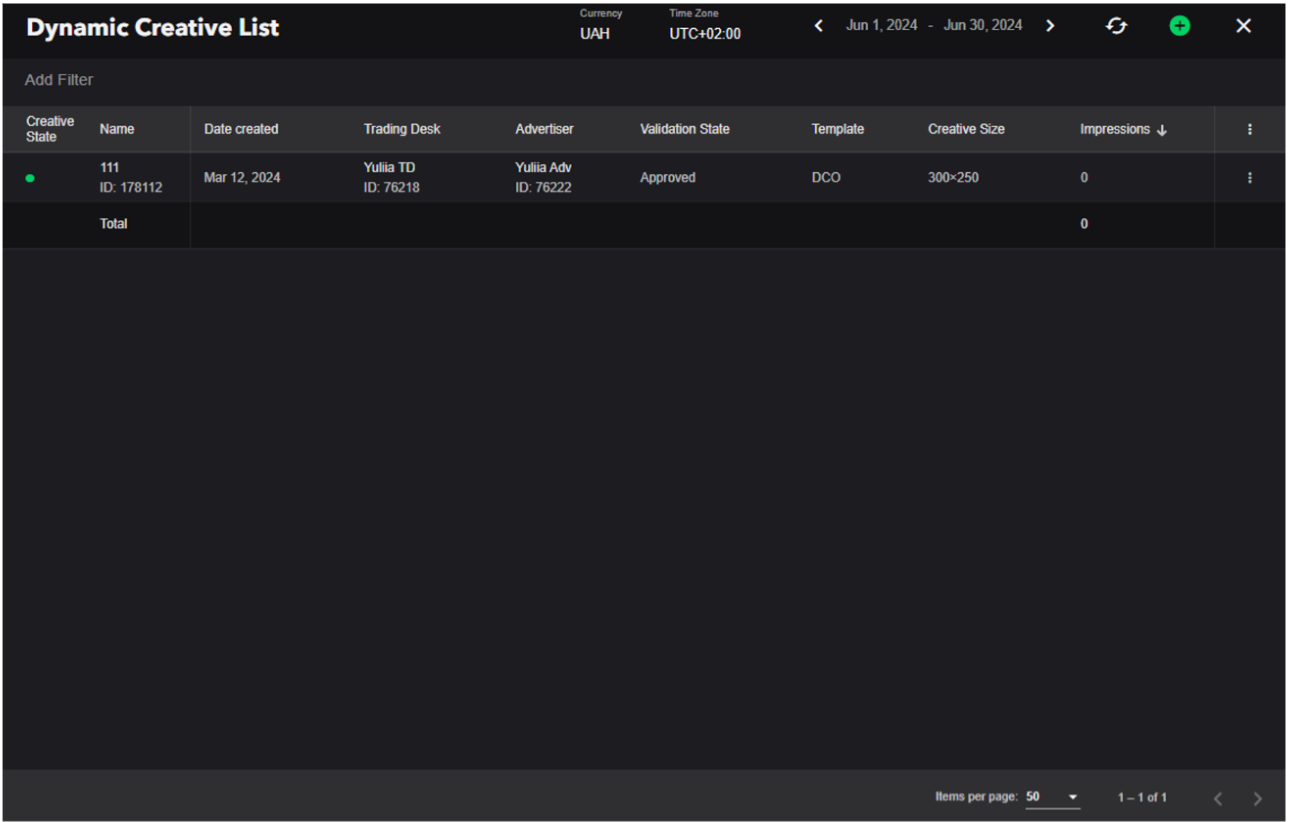
- When clicked, the corresponding blade will open. All available Dynamic Creatives of this account will be displayed on the blade. Creatives can be filtered by:
- status (if green - it is active, yellow - stopped);
- name;
- Advertiser;
- validation status;
- template;
- format size;
- the number of impressions.
Creating dynamic creatives
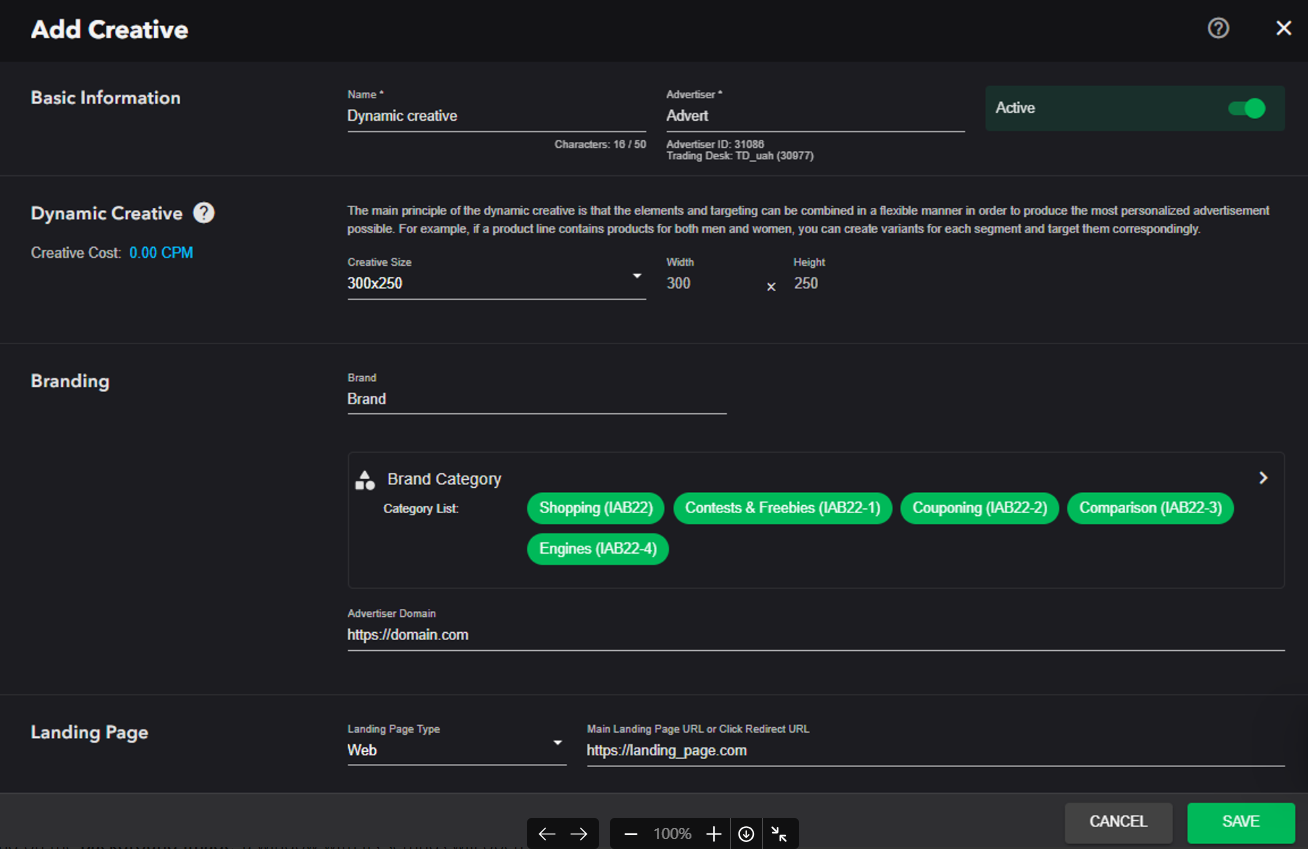
To create a new Dynamic Creative, click on the green plus button . In the Dynamic Creative Editor window:
- Enter the name of your creative;
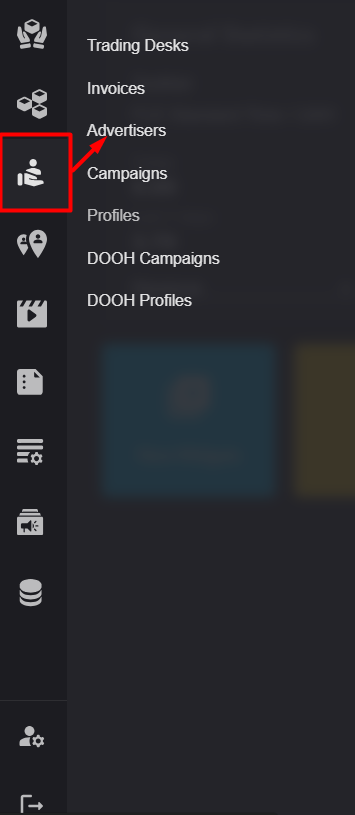
- Choose the Advertiser. In order for the Advertiser to appear in the list, it must first be created in the side bar menu "Direct Demand -> Advertisers";
- Specify the dimensions of the creative. Standard sizes are available in the drop-down menu. If the size you need is not available, select "Custom" and enter your own Width and Height;
- Specify the Brand, choose the Brand category and fill in the "Advertiser Domain" field;
- After that, choose the type of landing page (Web/IOS/Android) and specify the address of the Landing page;
- Save your Dynamic Creative at this stage for further customization.
Setting Assets
After saving the creative, you need to fill in the Assets field, that is, the components of the Dynamic creative, such as the Background Image, Image, Headline, etc., from which various variations of the creative will later be assembled.
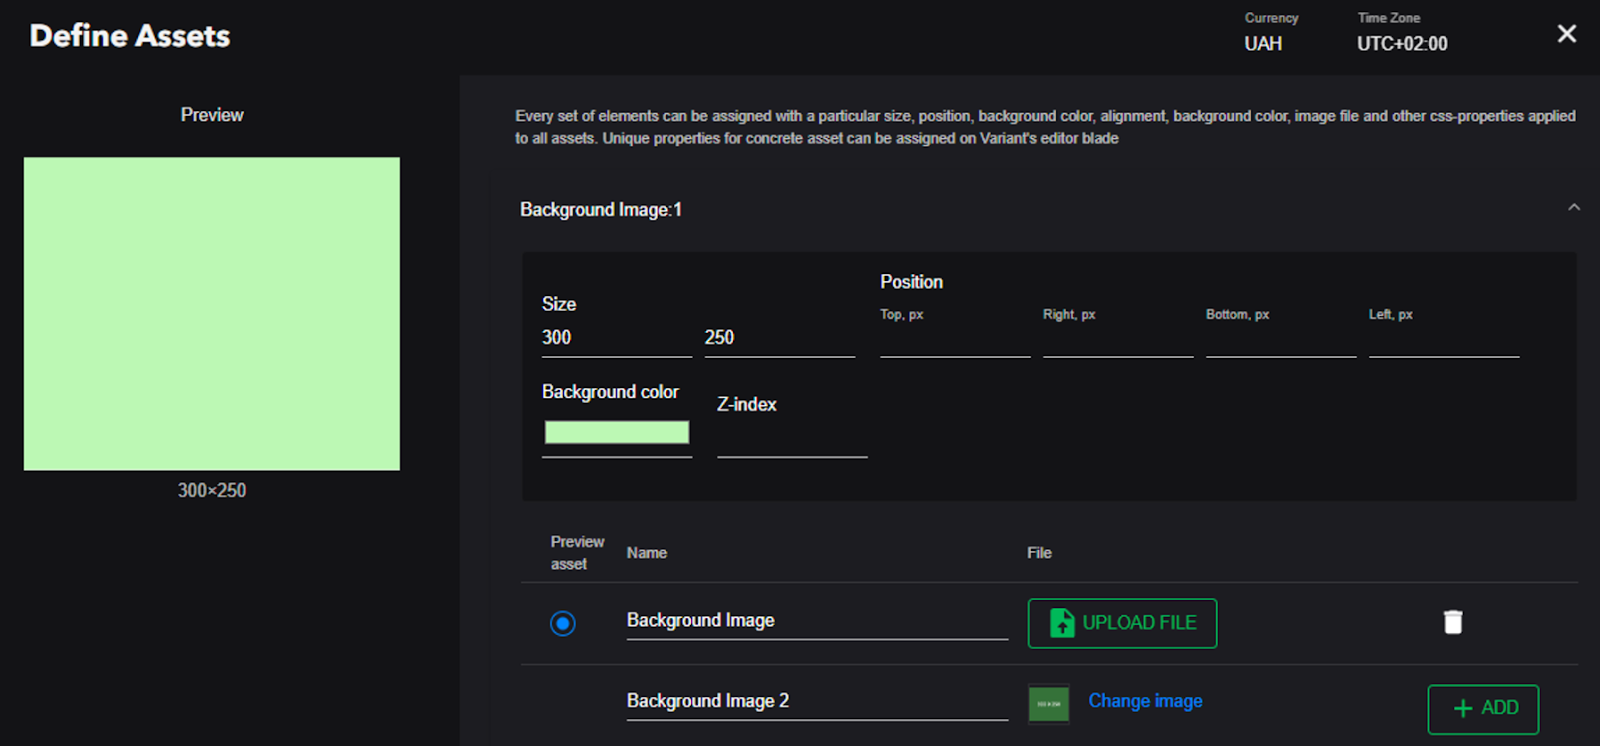
- When clicking on the Background Image, a window with its settings will open:
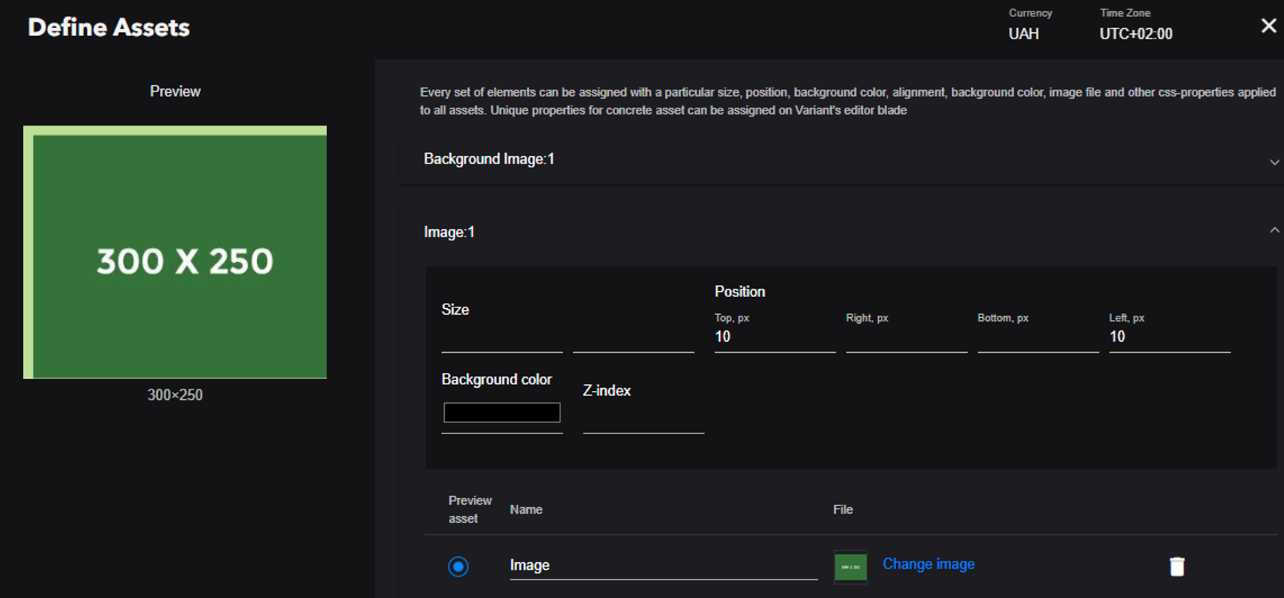
- In addition to the Background Image, you can add an additional visualization by going to the "Images" block. To do this, enter the Name, download the image from the computer. After pressing the "ADD" key, the asset is attached to the creative and can be viewed in the "Preview" window.
- The same steps required if you need add a “Logo” using corresponding block.
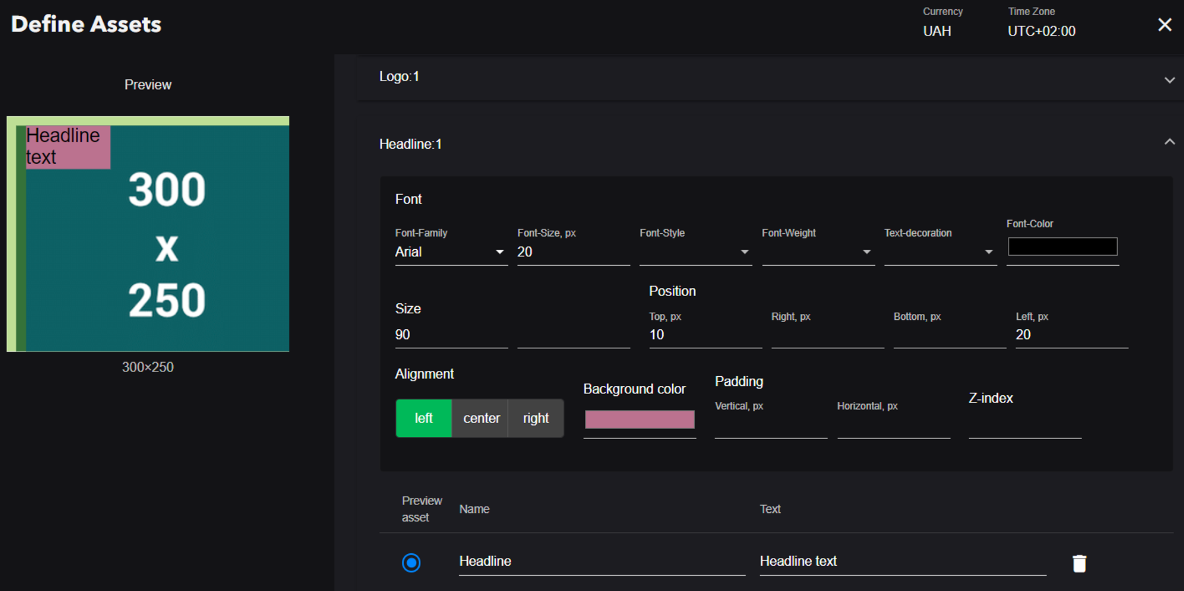
- The next step is adding a Headline.
- You need to specify the Name of the asset and to add the text of the Headline → Press “ADD” button. After it you will see the text in the "Preview" window
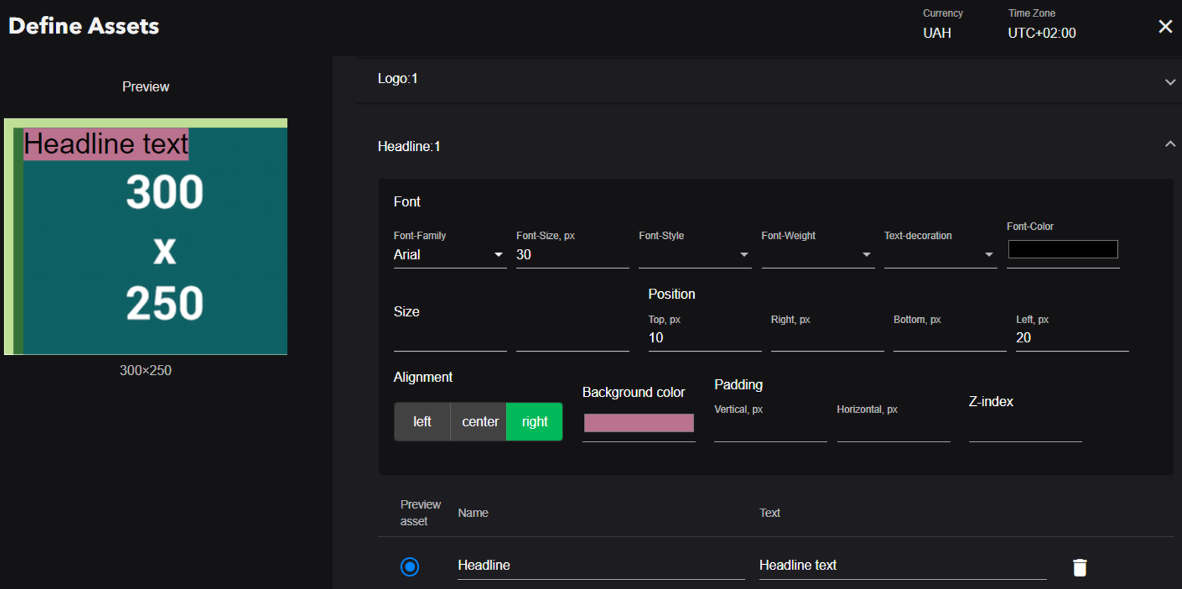
- Now you can change such parameters as: Font-Family, Font-Size, etc. as well its Position, Background and other settings from this block.
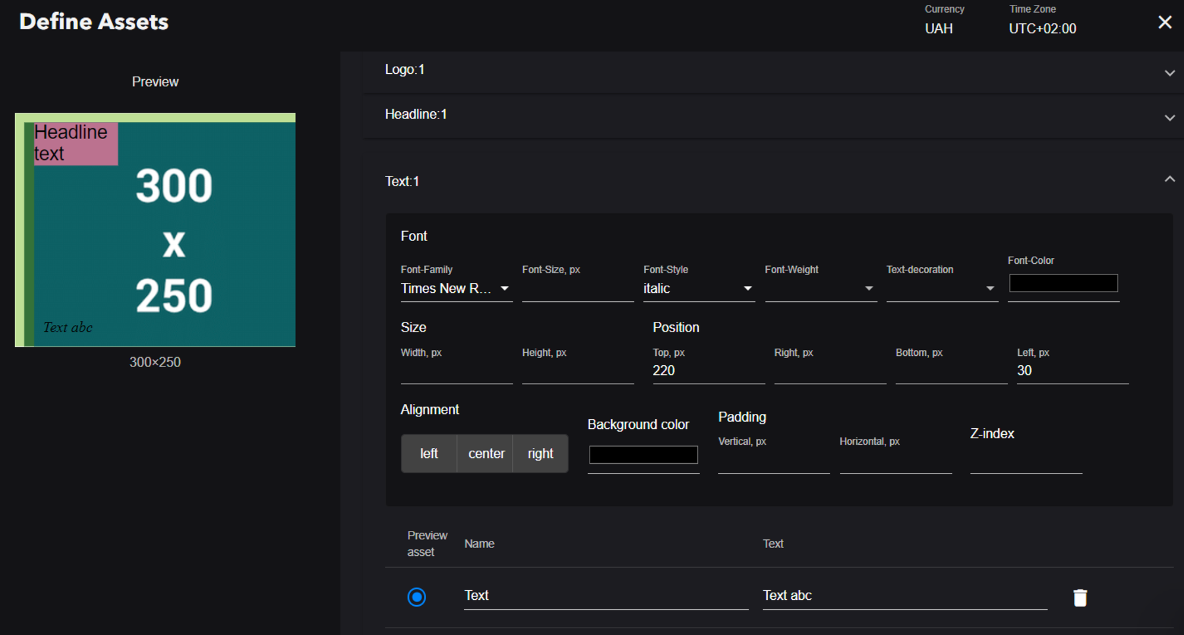
- You can add additional text to the banner using the "Text" block.
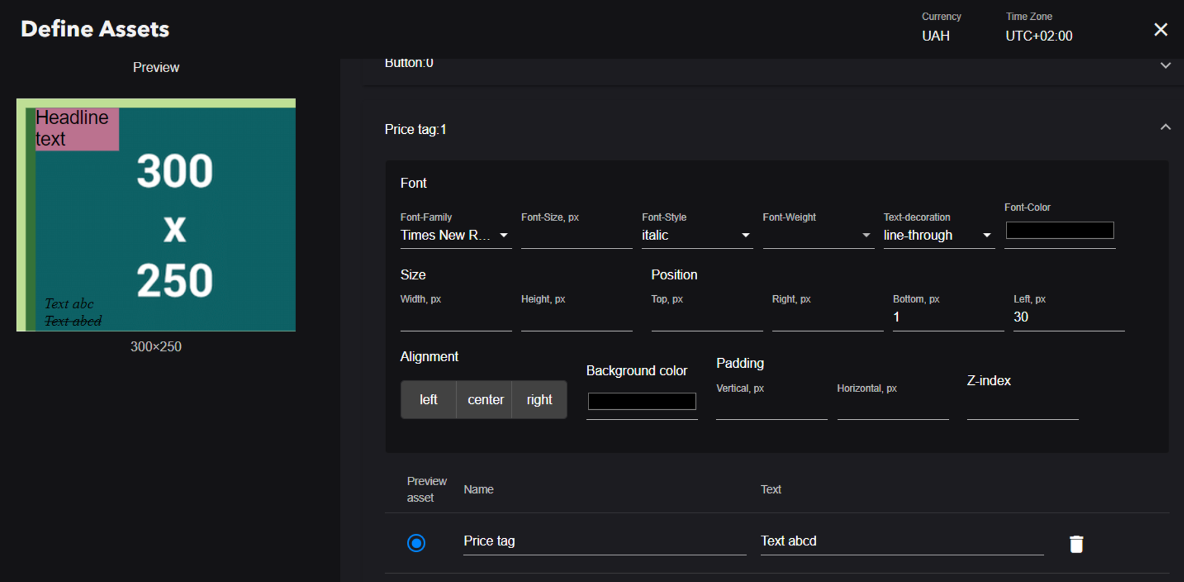
- The "Price tag" block is added using the same algorithm by specifying the asset name and text.
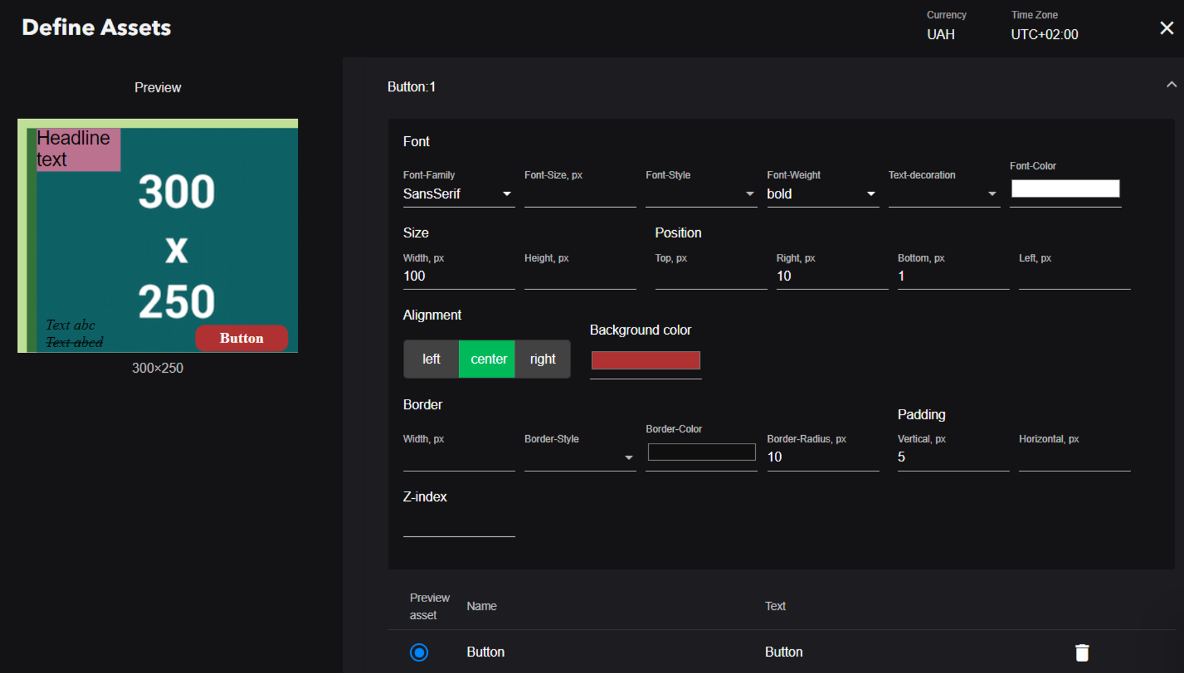
- The final step in creating a creative is the "Button" block.
The Background Image can be either a color fill or an image that needs to be downloaded from your computer. In this case, the dimensions are not indicated, because the image will automatically stretch to the size of the creative. To view the added asset, click on the "ADD" button. To save the asset, it is necessary to give it a name. It is possible to add several Background Images at the same time.
In the "Position" block, the position of the Image on the creative is adjusted by setting the Top-Right-Bottom-Left indents.

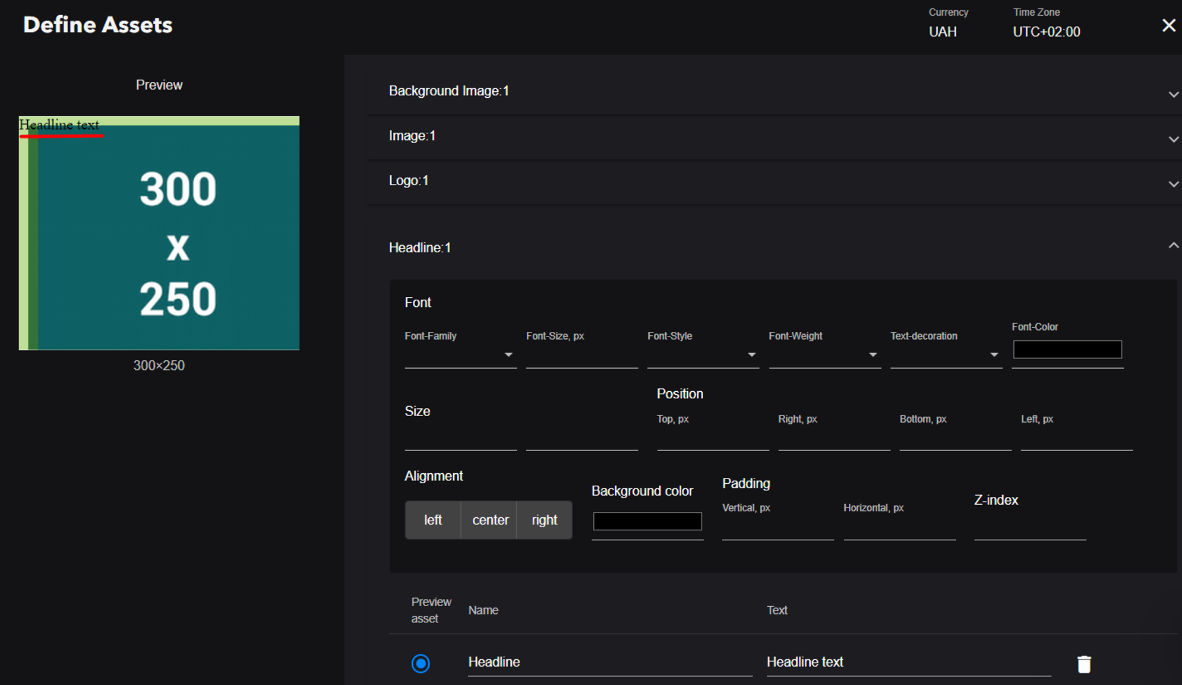
By filling in the "Size" field, you can limit the size of the text block and thus configure the text wrapping in the headline.
To do this, enter the asset name and text. After clicking the "ADD" button, the asset is created. Next, specify the Size and Font-Family. You also have the option to set the background and adjust its position using the "Position" block.
After clicking the "ADD" button, the "Price tag" will appear in the Preview window, and you can set its position using margins. A useful field in this block is the "Text-decoration" field, which allows you to underline, strikethrough, or draw a line above the text.
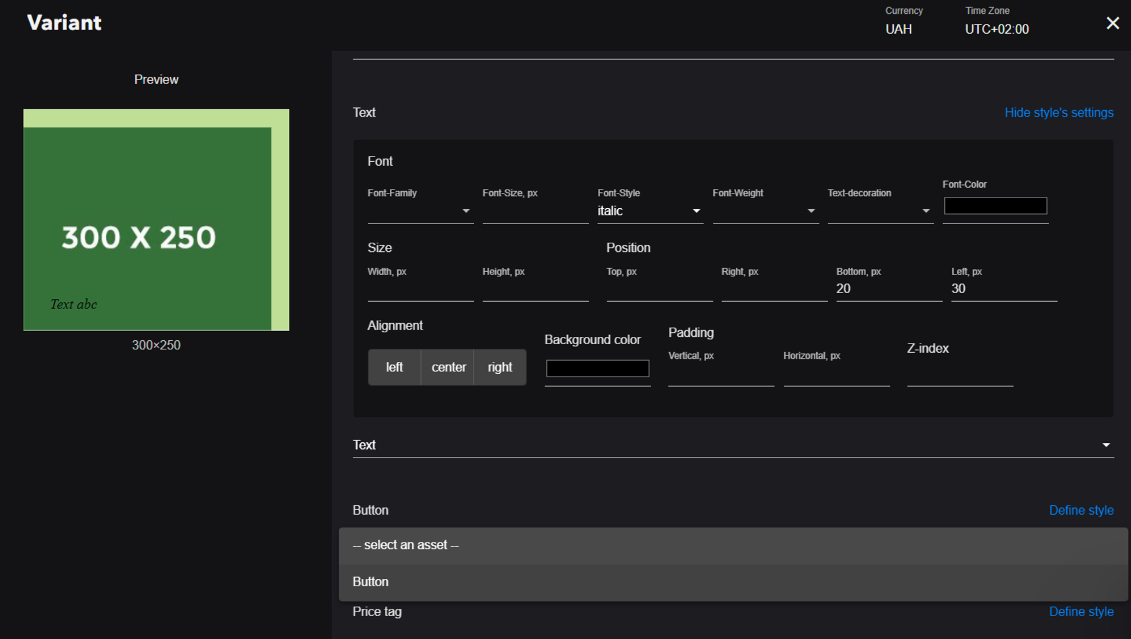
When creating it, as with the previous blocks, you need to specify the asset name and enter the button text. Next, set the Font-Family and text size. Then, adjust the button's position using the "Position" block, margins, and Alignment. You should also set the button's width, relative to which it will be aligned. Additionally, you can adjust the text and button color using the "Font-Color" and "Background color" fields. The "Padding" block allows you to set vertical and horizontal margins from the edge of the letters. By setting the vertical margin, you can increase the button size. An additional feature in this block is the ability to create rounded edges. To do this, enter a value in the corresponding field named "Border-Radius.”
After creating the assets, save them by clicking the "SAVE" button in the bottom right corner of the page.
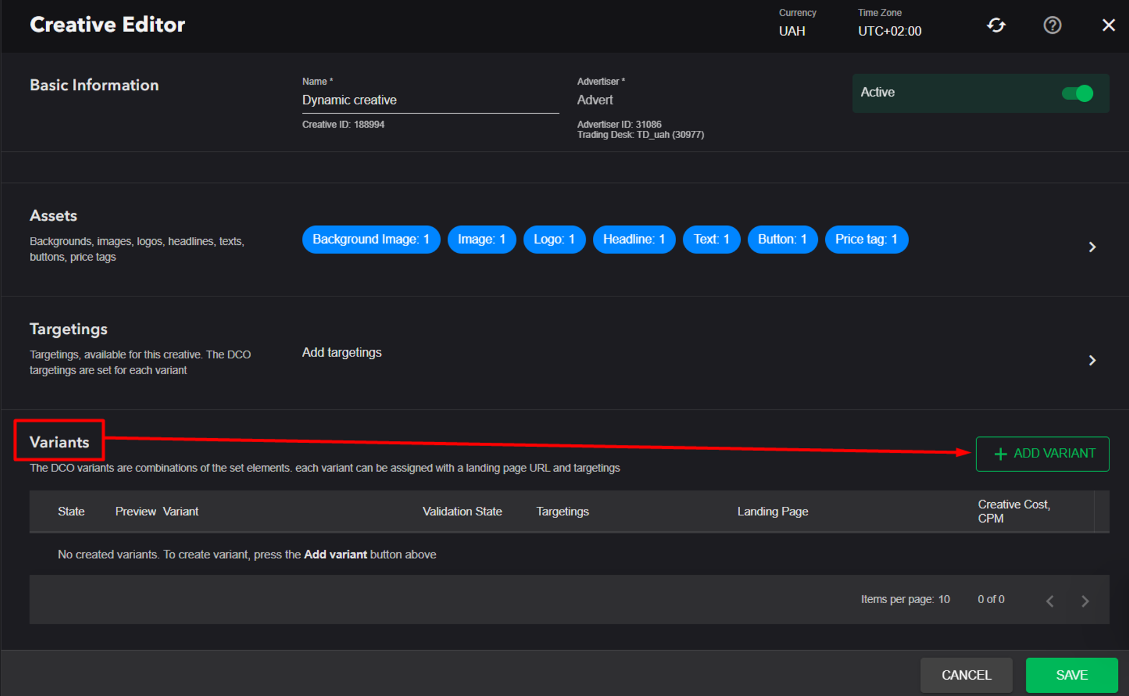
Adding Variants
Once the creative is saved, you can proceed to assembling the Variants (different versions of the dynamic creative).
- In the creative editing blade, select "Variants", which will open the corresponding blade.
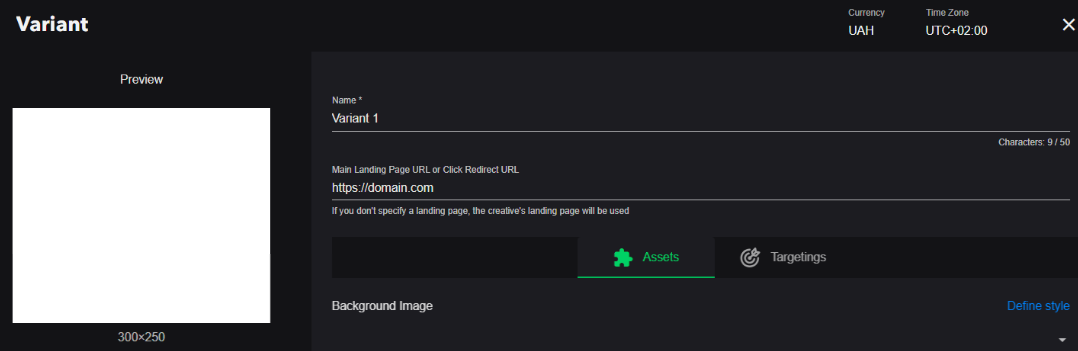
- Before assembling the variant, you should enter its Name and the Landing Page to which this variant will lead.
- Creating a Variant is done by selecting previously saved assets from the drop-down list, which can be modified using the settings in the "Define style" block.
After saving the settings, this version of the creative will appear in the list of available Variants.
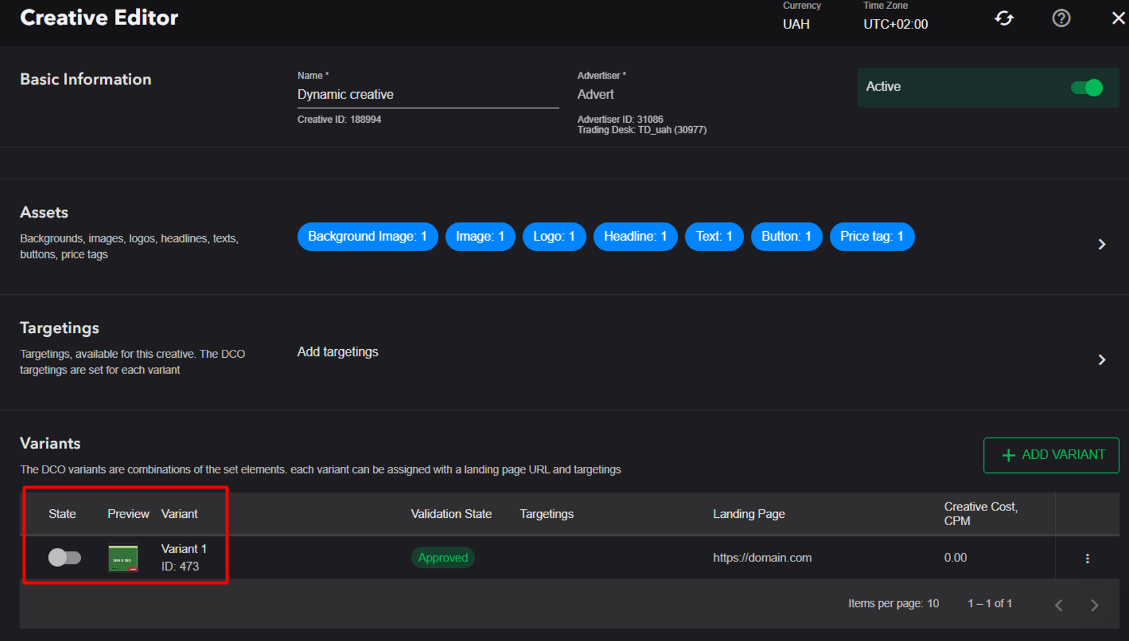
In this way, you can create multiple variants of dynamic creatives.